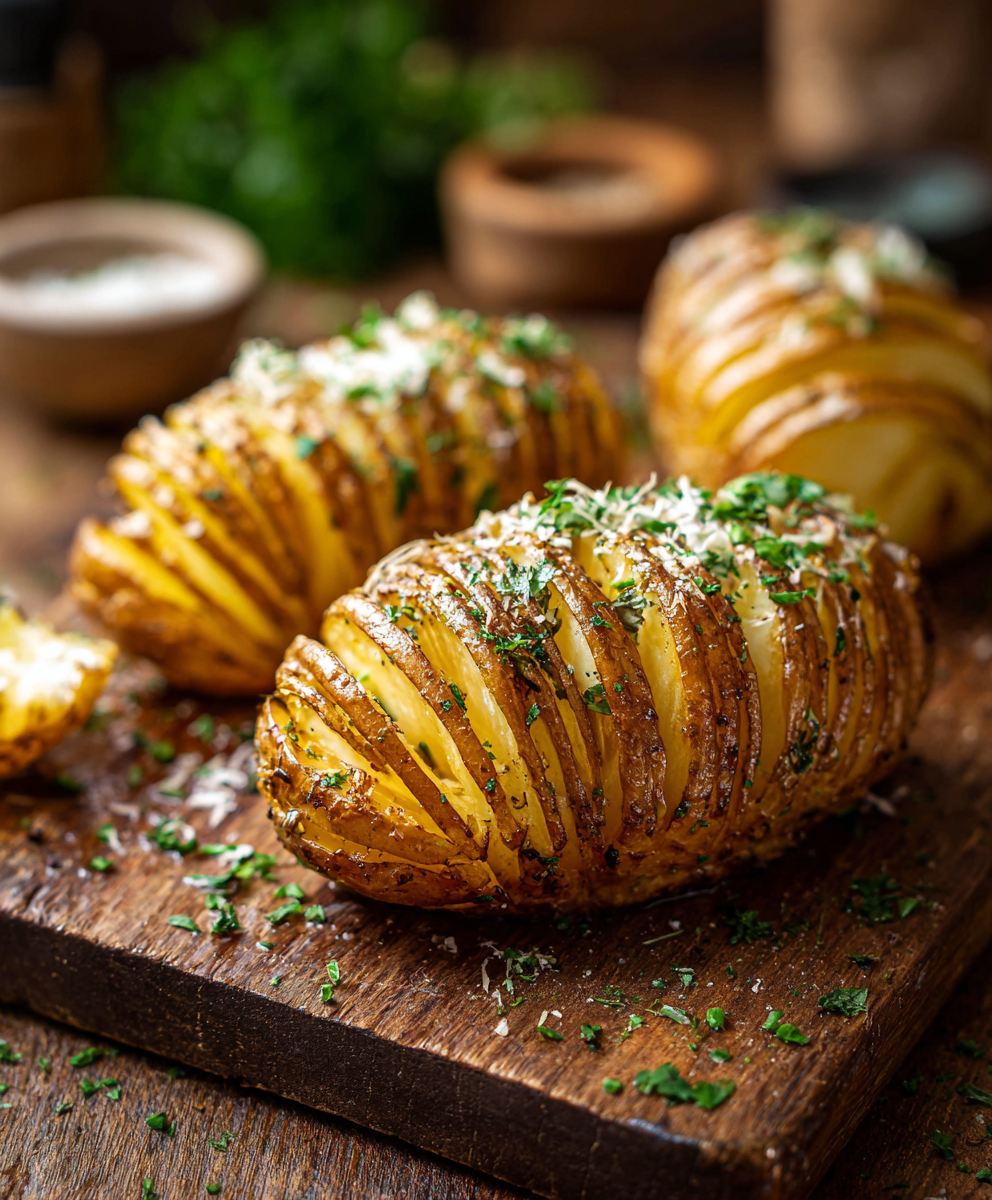
Classic Hasselback Potatoes

Crispy on the outside, tender inside: classic Hasselback potatoes brushed with melted butter and seasoned simply with kosher salt and pepper.
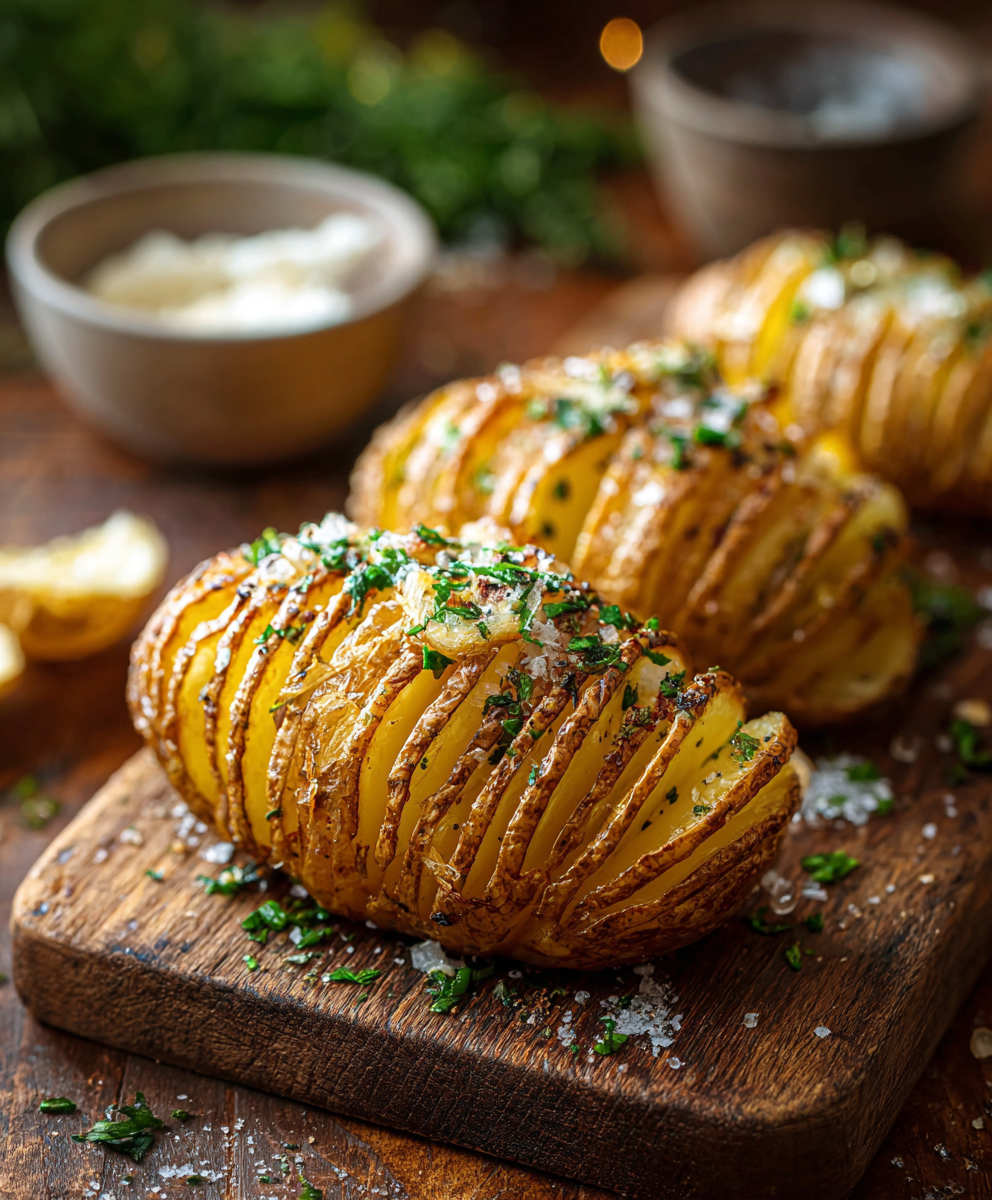
This batch of Hasselback potatoes has been my go-to for gatherings, weeknight dinners, and the occasional cozy Sunday supper. I first learned the technique years ago while flipping through a worn cookbook and watching a cooking show, and the simple act of slicing a potato into thin, accordion-like layers completely transformed a humble spud into something celebratory. The result is a golden, crisp exterior with thin, buttery ridges and a soft, steaming interior — a texture contrast that always gets an audible reaction around my table.
I made these the first time for a small holiday meal when I didn't have the time or the inclination to fuss over complicated sides. They were easy enough to prep in less than 20 minutes and baked while I focused on the main course. What surprised me most was how few ingredients are needed to make them taste so elevated: just good russet potatoes, real butter, and a confident hand with a knife. Every bite yields a little crisped edge and a fluffy middle; my children loved separating the slices and dipping them into ketchup, while adults preferred a sprinkle of flaky sea salt and a swipe of sour cream. These potatoes have since become a staple whenever I want something impressive with minimal fuss.
Why You'll Love This Recipe
- Transforms ordinary potatoes into a show-stopping side with minimal ingredients and equipment — ready to bake in about 15 minutes and done in roughly 1 hour total.
- Uses pantry staples: russet potatoes, butter, kosher salt, and black pepper — no specialty oils or hard-to-find seasonings required.
- Make-ahead friendly: slice and prep potatoes a few hours ahead and refrigerate on a tray covered in plastic wrap until ready to bake.
- Highly adaptable for dietary needs and toppings — serve dairy-free by swapping butter for olive oil, or add cheese and herbs for a richer version.
- Great for crowds: multiply quantities easily and bake on multiple pans; the simple technique scales without changing the method.
My family reaction has always been consistent: the crisped edges disappear first and there's an appreciative silence as everyone savors the texture. Over the years I've tweaked the butter-to-potato ratio and the spacing of the slits to create the perfect balance of crunch and tenderness. These little adjustments were learned by doing — cutting a test potato, watching the oven, and learning when to baste so the butter seeps into the crevices without burning.
Ingredients
- Russet potatoes (4 large): Choose firm, heavy potatoes about 10–12 ounces each for even cooking. Russets give a fluffy interior and crisped ridges; brands vary by region, but look for dry, not waxy, potatoes.
- Unsalted butter (4 tablespoons), melted: Use real butter for the best flavor and browning. If you prefer a slightly nuttier taste, use European-style butter; for dairy-free, substitute 4 tablespoons olive oil.
- Kosher salt (1 teaspoon): Kosher crystals season evenly; if using table salt, use about 1/2 teaspoon instead because it is finer.
- Freshly ground black pepper (1/2 teaspoon): Adds a bright background heat. Adjust to taste after baking if you prefer more bite.
- Extra salt and pepper to taste: Keep flaky sea salt or a grinder on the table for finishing — a tiny sprinkle of flaky salt elevates the crisp edges.
Instructions
Preheat and prepare: Arrange an oven rack in the middle position and preheat the oven to 425°F. Use an unlined baking sheet so the potato bottoms crisp directly on metal; a light spray of oil is optional. Make sure potatoes are washed and dried thoroughly — moisture on the skin produces steam and prevents crisping. This step takes about 10 minutes including preheat. Slice using a guide: Place one potato between two chopsticks or skewers to act as a stop for your knife. With a sharp chef's knife, make vertical slits about 1/8 inch apart, cutting straight down until the knife hits the chopstick and the bottom remains intact. The guide prevents slicing all the way through. Repeat with remaining potatoes. The goal is thin, even slits to maximize crisp surface area without collapsing the potato. Butter and season: Brush roughly half (2 tablespoons) of the melted butter all over each potato, making sure to work some butter into the slits with the brush tip. Season each potato with the measured kosher salt and black pepper. Proper seasoning at this stage ensures the interior is well-flavored, not just the surface. Bake, pull layers, and baste: Bake the potatoes on the unlined sheet for 30 minutes. After 30 minutes, remove the pan and gently fan the slits apart using a knife tip or small spatula — this opens channels for steam to escape and for more butter to reach the crevices. Brush on the remaining melted butter, getting between slices where possible. Finish roasting and serve: Return to the oven and bake 30–35 more minutes, or until potatoes have deep golden-brown, crispy edges and a tender center when tested with a skewer. Total oven time is approximately 60–65 minutes depending on potato size. Serve warm, finishing with extra kosher or flaky salt and a grind of pepper to taste.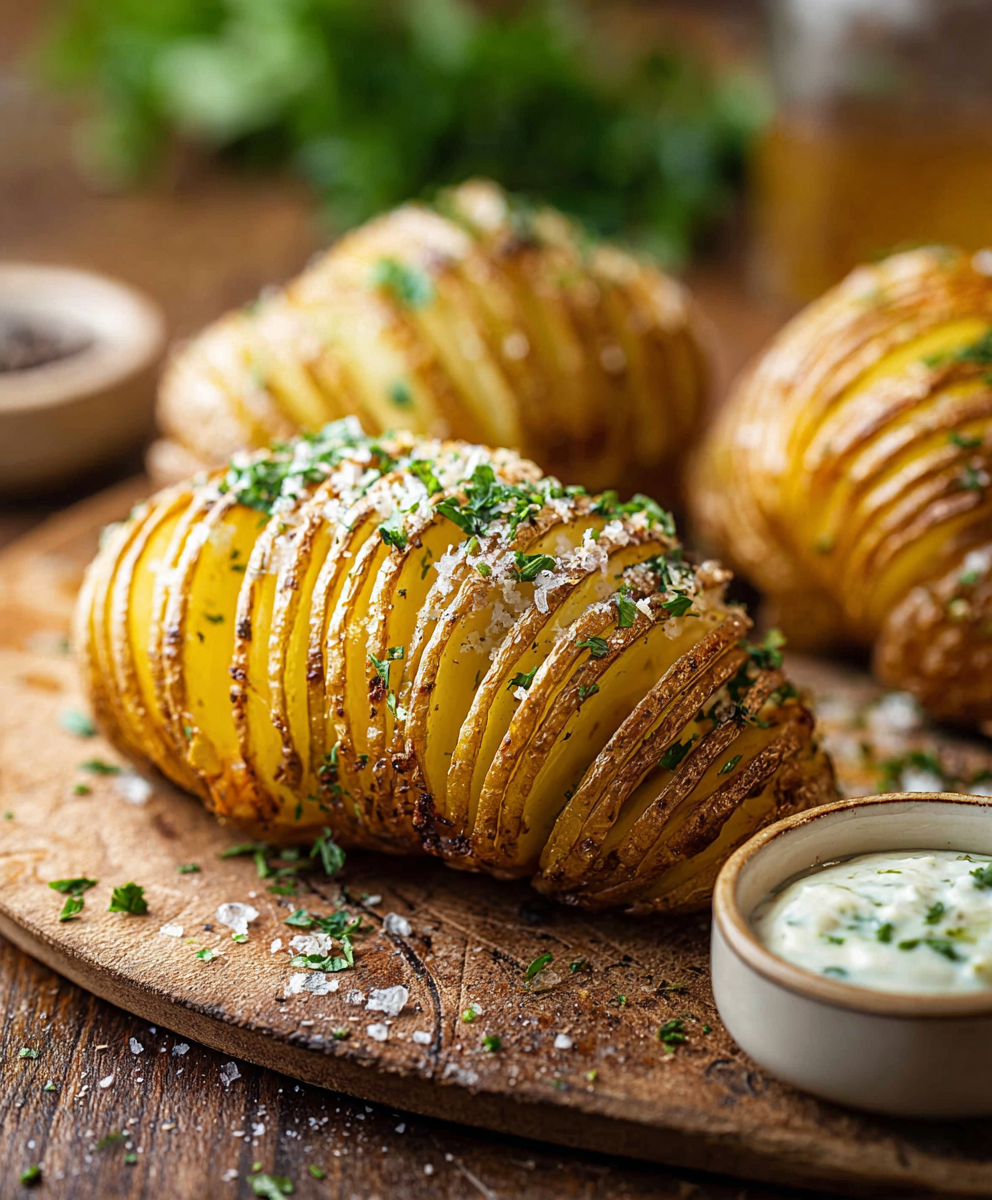
You Must Know
- These are high in potassium and provide complex carbs; each portion is a satisfying starchy side that keeps you full.
- They freeze poorly — for best texture, refrigerate cooked potatoes up to 3 days and reheat in the oven to re-crisp.
- Butter browns and can burn; baste after the first 30 minutes so the butter soaks in and the surface crisps rather than burns.
- Cooking time varies by potato size; test for doneness with a skewer in the thickest part — it should meet little resistance.
What I love most is how little fuss produces such a crowd-pleasing result. On holidays these disappear fast; the thin slices let the butter, salt, and heat do the heavy lifting. One memorable Thanksgiving they were the surprise favorite, especially with kids who loved peeling away the thin slices. Small technique choices — the use of chopsticks as a guide, a sharp blade, and timing the second baste — are what make the difference between an okay side and a stellar one.

Storage Tips
Store cooled potatoes in an airtight container in the refrigerator for up to 3 days. To reheat and re-crisp, place them on a baking sheet at 400°F for 8–12 minutes until heated through and edges re-crisped; avoid microwaving if you want to keep the exterior texture. If you must freeze, flash-freeze on a tray until solid, then transfer to a freezer bag for up to 1 month, but expect a softer texture when thawed and reheated. Use oven warming to refresh the crust and avoid sogginess.
Ingredient Substitutions
If you prefer a dairy-free version, replace melted butter with equal parts extra-virgin olive oil or a neutral oil; brush and baste the same way. For a richer finish, add 1–2 tablespoons grated Parmesan in the last 10 minutes of baking. Swap kosher salt for sea salt flakes as a finishing touch. Small red potatoes or Yukon Golds can be used, but they yield a different texture — waxy potatoes will be creamier and less fluffy inside, and you may need to shorten roast time by 10–15 minutes.
Serving Suggestions
Serve warm as a centerpiece side alongside roasted meats, grilled seafood, or a hearty vegetable stew. Top with a dollop of sour cream and chives for a baked-potato vibe, or scatter torn fresh herbs like parsley and thyme for brightness. For game-day fare, offer a small bowl of shredded cheddar and bacon bits for friends to customize. Presentation-wise, place two potatoes per plate with a wedge of lemon or a small ramekin of herbed butter for elegant serving.
Cultural Background
The Hasselback technique originated in Sweden at the Hasselbacken restaurant in the 1950s, where thinly sliced, fanned potatoes were cooked to display a crisp texture and decorative appearance. The method became a classic in Scandinavian kitchens and spread internationally because it maximizes surface area for browning while preserving a tender interior. Over time, cooks have adapted the technique around the world, layering different fats, seasonings, and cheeses to suit regional tastes.
Seasonal Adaptations
In winter, enhance these with roasted garlic butter and a sprinkle of smoked paprika for warmth. In spring and summer, add fresh lemon zest and chopped dill for brightness or top with a lemon-herb labneh. For holiday meals, tuck thin slices of garlic and rosemary between some of the slits before baking and finish with a drizzle of browned butter and a few flakes of sea salt.
Meal Prep Tips
Slice potatoes in the morning or the night before and keep them chilled on a tray covered with plastic wrap so they don’t discolor. Melt butter and keep it at room temperature in a small container for quick basting. When baking multiple trays, rotate pans halfway through the final bake to ensure even browning. Portion cooked potatoes into individual containers and reheat in the oven for best texture when using them for meal-prep lunches.
These potatoes prove that a little technique goes a long way. Whether for weeknight dinners or special occasions, they’re an easy way to add a memorable side with minimal effort. Give them a try and make small adjustments to match your taste — they’re forgiving and endlessly adaptable.
Pro Tips
Use a sharp knife and steady hand to make clean, even slits for uniform cooking.
Place chopsticks or skewers on either side of the potato to avoid slicing through the bottom.
Baste with butter after the first 30 minutes to prevent burning and to let flavor penetrate the slits.
Test doneness with a skewer — it should slide into the center with minimal resistance.
Reheat in the oven at 400°F to re-crisp the edges rather than microwaving.
This nourishing classic hasselback potatoes recipe is sure to be a staple in your kitchen. Enjoy every moist, high protein slice — it is perfect for breakfast or as a wholesome snack any time.
Tags
Classic Hasselback Potatoes
This Classic Hasselback Potatoes recipe makes perfectly juicy, tender, and flavorful steak every time! Serve with potatoes and a side salad for an unforgettable dinner in under 30 minutes.
Instructions
Preheat and prepare
Preheat oven to 425°F and position a rack in the middle. Wash and dry potatoes thoroughly. Have an unlined baking sheet ready so potato bottoms brown directly on metal.
Use a slicing guide
Place a potato between two chopsticks or skewers to prevent slicing through the base. Using a sharp knife, cut vertical slits about 1/8 inch apart until the knife hits the chopstick, leaving the bottom intact.
Butter and season
Brush half the melted butter (about 2 tablespoons) over each potato, ensuring butter reaches inside the slits. Season with 1 teaspoon kosher salt and 1/2 teaspoon black pepper distributed across the potatoes.
Initial bake and baste
Bake on the unlined baking sheet for 30 minutes. Remove from oven and gently fan the slits apart with a knife tip to open channels. Brush remaining melted butter between the slices.
Finish roasting and serve
Return to the oven and bake an additional 30–35 minutes until edges are deep golden and interiors are tender when pierced. Serve warm, finishing with flaky sea salt and freshly ground pepper.
Last Step: Please leave a rating and comment letting us know how you liked this recipe! This helps our business to thrive and continue providing free, high-quality recipes for you.
Nutrition
Did You Make This?
Leave a comment & rating below or tag
@galovicooking on social media!
Categories:
You might also like...

Air Fryer Buffalo Cauliflower
Crispy battered cauliflower florets tossed in tangy buffalo sauce — a spicy, vegetarian crowd-pleaser that’s quick to make in the air fryer.
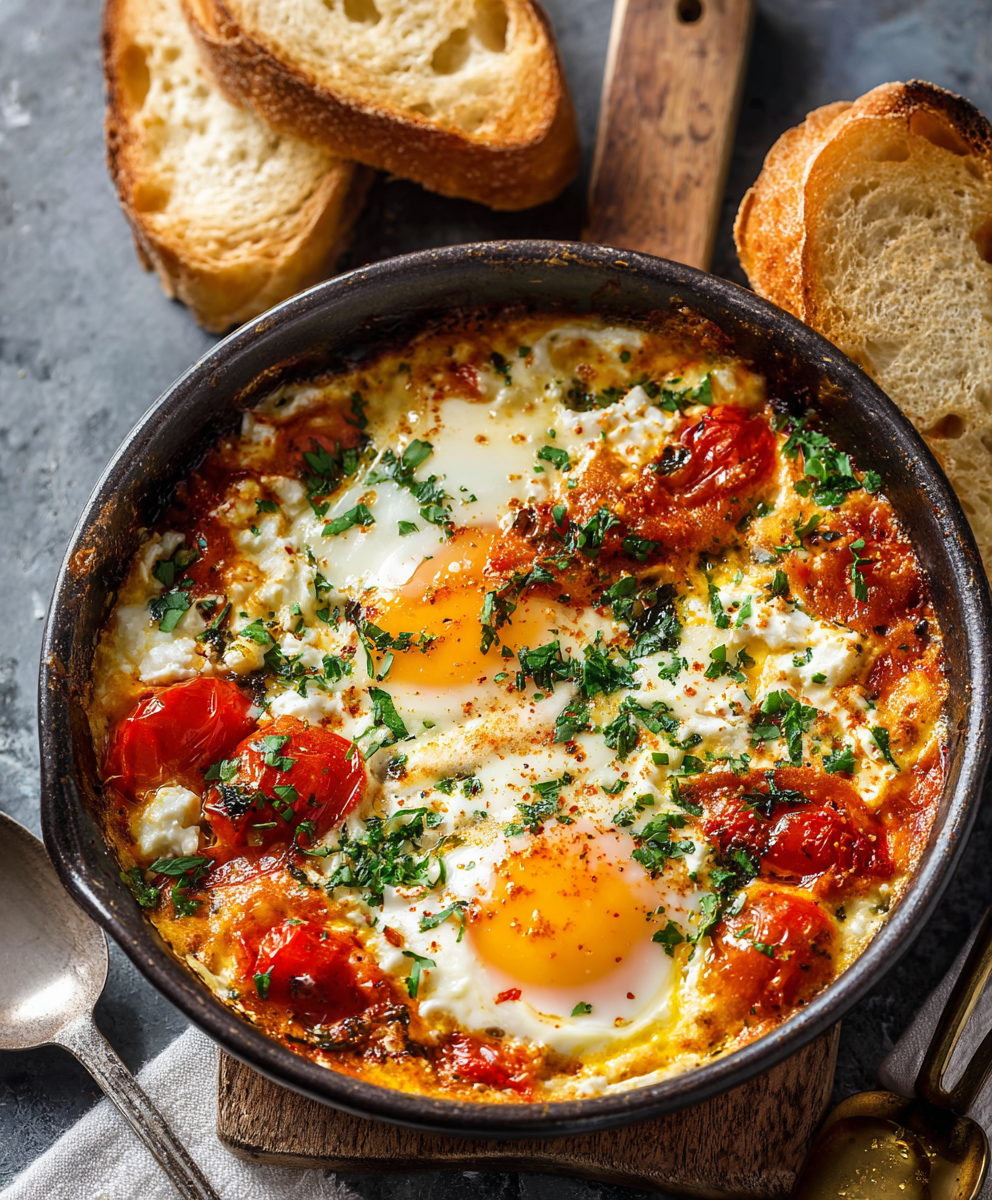
Baked Feta Eggs
A comforting Mediterranean-inspired bake of roasted tomatoes, feta, spinach, and eggs — creamy, savory, and perfect for breakfast, brunch, or an easy weeknight meal.

Biscoff Cheesecake Cups
Individual no-bake cups layered with crunchy Biscoff cookie base and a silky Biscoff cream filling — an easy, make-ahead dessert that wows every time.
Did You Make This?
Leave a comment & rating below or tag @galovicooking on social media!
Rate This Recipe
Share This Recipe
Enjoyed this recipe? Share it with friends and family, and don't forget to leave a review!
Comments (1)
This recipe looks amazing! Can't wait to try it.
Comments are stored locally in your browser. Server comments are displayed alongside your local comments.
Hi, I'm Ava!
What's Popular
30-Minute Meals!
Join to receive our email series which contains a round-up of some of our quick and easy family favorite recipes.